I assume, that we have already a clean installation of Centos Stream 9.
So, as usual, start with full upgrade of this system:
dnf update -y
After reboot set hostname:
hostnamectl set-hostname cloud.example.com
Next, we install and create empty database for our nextcloud. Then we start it and enable for autostart after boot.
If you wish, you can skip installations of MariaDB and you can use built-in SQLite. Then you can continue with installing apache web server.
dnf -y install mariadb-server
...
systemctl enable mariadb --now
Now, we run post installation script to finish setting up mariaDB server. Set your own password for root access:
mysql_secure_installation
Set root password? [Y/n] y
Remove anonymous users? [Y/n] y
Disallow root login remotely? [Y/n] y
Remove test database and access to it? [Y/n] y
Reload privilege tables now? [Y/n] y
Now, we can create a database for nextcloud.
mysql -u root -p
...
CREATE DATABASE cloud;
GRANT ALL PRIVILEGES ON cloud.* TO 'nextuser'@'localhost' IDENTIFIED BY 'YOURPASSWORD';
FLUSH PRIVILEGES;
exit;
Now, we install Apache web server, and we start it and enable for autostart after boot:
dnf install httpd -y
systemctl enable httpd.service --now
And set up firewall fow port http/80 only:
systemctl status httpd
firewall-cmd --list-all
firewall-cmd --zone=public --permanent --remove-service=dhcpv6-client
firewall-cmd --zone=public --permanent --add-service=http
firewall-cmd --reload
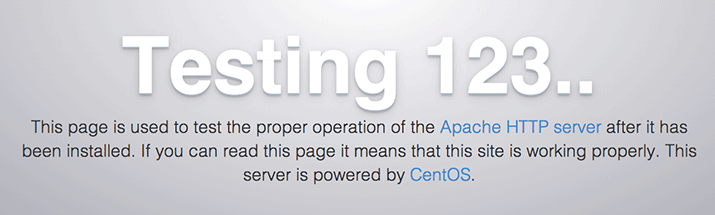
Now point your browser to this server and look, if you see a Apache test page.
Now we can install php. Nextcloud (at this time is version 28.0.4) supports PHP (8.1, 8.2, 8.3). So I use remi repositories and install php 8.3 for Centos Stream 9. Because by default, Centos has available packages for 8.0.30 now:
dnf info php
...
Available Packages
Name         : php
Version      : 8.0.30
Release      : 1.el9
Architecture : x86_64
Size         : 4.7 k
Source       : php-8.0.30-1.el9.src.rpm
Repository   : appstream
So, continue and enable Remi for php v. 8.3:
dnf install dnf-utils http://rpms.remirepo.net/enterprise/remi-release-9.rpm
dnf module list php
dnf module reset php
dnf module enable php:remi-8.3
dnf info php
...
Available Packages
Name         : php
Version      : 8.3.6
Release      : 1.el9.remi
Architecture : x86_64
Size         : 1.8 M
Source       : php-8.3.6-1.el9.remi.src.rpm
Repository   : remi-modular
Now we install som recommended php packages
dnf install -y php php-gd php-mbstring php-intl php-pecl-apcu php-mysqlnd  php-pecl-zip.x86_64 php-process.x86_64 php-bcmath php-gmp php-redis php-imagick
systemctl enable php-fpm.service --now
php -v
...
PHP 8.3.6 (cli) (built: Apr 10 2024 14:21:20)
Now, create own lvm partition for nextcloud of size 5G, and set xfs file system. If wish, create a much bigger partition fot nextcloud (mayby 100G…):
lvcreate -n cloud -L+5G your-vg
mkfs.xfs /dev/mapper/your-vg-cloud
Now, create you own directory, where the web content and all data from nextcloud will be server and mount our partition on it. Maybe, edit fstab and add this mount point, to enable it after reboot/start:
mkdir -p /var/www/html/nextcloud/
mount /dev/mapper/your-vg-cloud /var/www/html/nextcloud/
echo "/dev/mapper/your-vg-cloud /var/www/html/nextcloud xfs defaults 0 0" >> /etc/fstab
Now, we create a dedicated unix user for our cloud instance, who will be the owner of directory with files and these users run dedicated php-fpm process:
useradd -r com.example.cloud
cd /etc/php-fpm.d/
mv www.conf cloud.example.conf
Now, change pool name [www] with our name, change user and group of processes. Change socket name for this user, and directory for php sessions:
vim cloud.example.conf
[example]
user = com.example.cloud
group = com.example.cloud
listen = /run/php-fpm/example.sock
php_value[session.save_path]    = /var/lib/php/session/example
Now, create above folder for php session and change permissions:
mkdir /var/lib/php/session/example
chown com.example.cloud:com.example.cloud /var/lib/php/session/example
chmod +x /var/lib/php/session/
And restart php-fpm process and see, if there is php process with our name:
systemctl restart php-fpm.service
ps aux | grep example
...
Check, what php configuration is loaded and edit some variables for non-problem using of nextcloud:
php --ini |grep Loaded
sed -i "s/post_max_size = 8M/post_max_size = 4G/" /etc/php.ini
sed -i "s/upload_max_filesize = 2M/upload_max_filesize = 4G/" /etc/php.ini
sed -i "s/memory_limit = 128M/memory_limit = 1G/" /etc/php.ini
Now, go into our directory for cloud, and download latest nextcloud. Unzip it, move files and set ownership and restore label for selinux:
cd /var/www/html/nextcloud
wget https://download.nextcloud.com/server/releases/latest.zip
unzip latest.zip
rm latest.zip
mv nextcloud/* .
mv nextcloud/.htaccess .
mv nextcloud/.user.ini .
rmdir nextcloud/
mkdir data
cd ..
chown com.example.cloud:apache -R nextcloud
restorecon -Rv nextcloud
Now, if you (and I) using selinux, set permissions for some folders/files. Adjust you filepaths:
semanage fcontext -a -t httpd_sys_rw_content_t '/var/www/html/nextcloud/data(/.*)?'
semanage fcontext -a -t httpd_sys_rw_content_t '/var/www/html/nextcloud/config(/.*)?'
semanage fcontext -a -t httpd_sys_rw_content_t '/var/www/html/nextcloud/apps(/.*)?'
semanage fcontext -a -t httpd_sys_rw_content_t '/var/www/html/nextcloud/.htaccess'
semanage fcontext -a -t httpd_sys_rw_content_t '/var/www/html/nextcloud/.user.ini'
semanage fcontext -a -t httpd_sys_rw_content_t '/var/www/html/nextcloud/3rdparty/aws/aws-sdk-php/src/data/logs(/.*)?'

restorecon -Rv '/var/www/html/nextcloud/'
We can check our instance via built-in occ command:
cd /var/www/html/nextcloud
sudo -u com.example.cloud php occ
...
Nextcloud is not installed - only a limited number of commands are available
Nextcloud 28.0.4
Now, we create a configuration file for httpd. FilesMatch attribute is for handling php files with our own dedicated php-fpm process:
cd /etc/httpd/conf.d/
vim nextcloud.conf

<VirtualHost *:80>
  DocumentRoot "/var/www/html/nextcloud"
  ServerName  your.server.com

  <Directory /var/www/html/nextcloud>
    Require all granted
    AllowOverride All
    Options FollowSymLinks MultiViews

    <IfModule mod_dav.c>
      Dav off
    </IfModule>

<FilesMatch \.(php|phar)$>
        SetHandler "proxy:unix:/run/php-fpm/example.sock|fcgi://localhost"
</FilesMatch>

  </Directory>
</VirtualHost>
Now, reload gracefully httpd and we can access to our web via http://your.server.com and continue installation viac web installer. Set database, user, password…
Have fun and nice day.